Reviewed and updated: 12 August 2026
Editorial disclosure: GPTWala did not run a product shoot, AI editor, marketplace submission or controlled accuracy test for this article. The diagnostic system is editorial guidance based on current official sources and production reasoning. Product owners must compare every candidate with the exact physical SKU and verified product records.
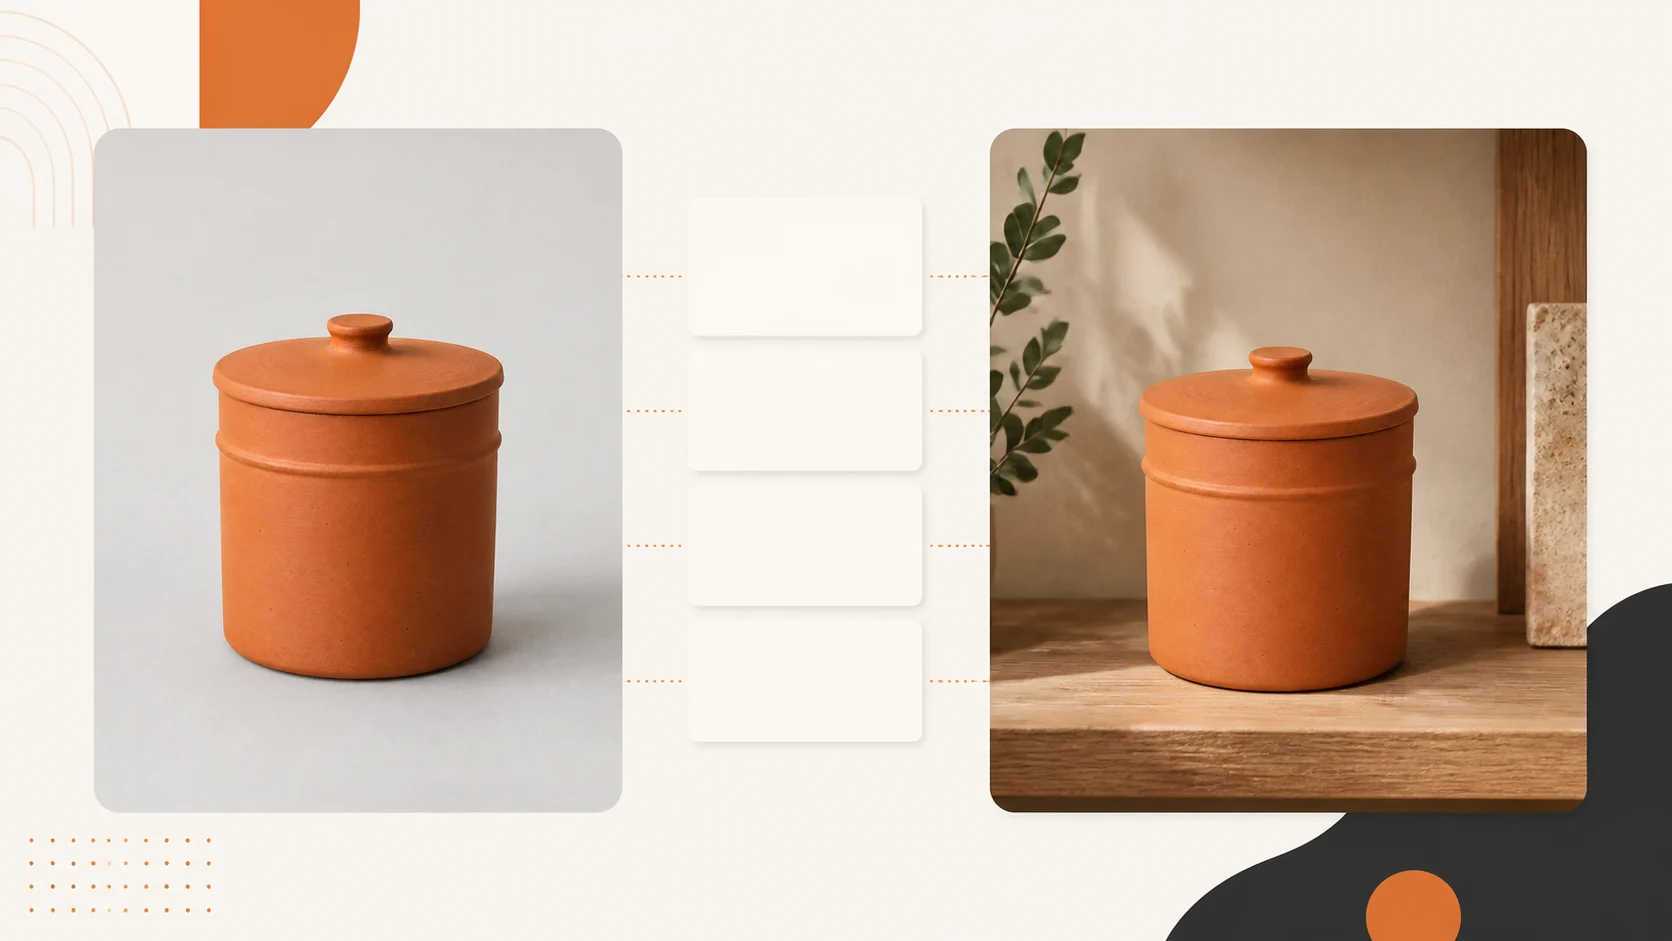
The safest way to fix an AI product-photo mistake is to find the first file where the product becomes wrong. Compare the source, mask, generated candidate, composite and export in order. Repair only that failing stage. Reject and recapture when identity, quantity, label, geometry, material, scale or another buying-relevant fact cannot be verified. Do not keep regenerating until a plausible image hides the defect.
Table of contents
- What counts as an AI product-photo mistake?
- Quarantine the image before troubleshooting
- Find the first wrong file
- Use the complete troubleshooting table
- Diagnose identity, text and quantity failures
- Diagnose shape, colour and material drift
- Diagnose edges, shadows and scale
- Diagnose file, channel and hand-off failures
- Choose a safe repair level
- Know when to stop and recapture
- Apply the method to Indian product businesses
- Prevent repeat failures without building more bureaucracy
- Run the rejection checklist
- Frequently asked questions
What counts as an AI product-photo mistake?
An AI product image has failed when it is unusable for its intended job, even if it looks polished. There are four different failure types:
| Failure type | The image may look like | The real problem | Appropriate response |
|---|---|---|---|
| Product-truth failure | Attractive and believable | A buyer-relevant product or offer fact changed | Reject; restore verified evidence or recapture |
| Presentation failure | Rough, cut out or poorly grounded | Product may still be correct, but the image distracts or confuses | Repair the background, edge, shadow or crop without touching the SKU |
| Destination failure | Correct on the editing screen | The crop, overlay, file, metadata or current channel rule fails after export | Re-export from the approved master and verify the destination |
| Process failure | Each file looks acceptable alone | Wrong SKU mapping, inconsistent batch style or unclear approval lets the wrong asset travel | Quarantine the batch; correct mapping, ownership or hand-off |
The most dangerous mistake is not always the most obvious. A rough shadow is visible and usually repairable. A subtly changed valve port, sari border, stone setting or pack quantity can look professional while describing the wrong product.
This guide owns symptom-led diagnosis and the fix-or-reject decision. It does not repeat the full phone-to-approved image workflow, the one-phone-photo tutorial, the background-generation workflow or the broader AI image accuracy governance system. Use those pages for their respective jobs.
A mask is not a product lock
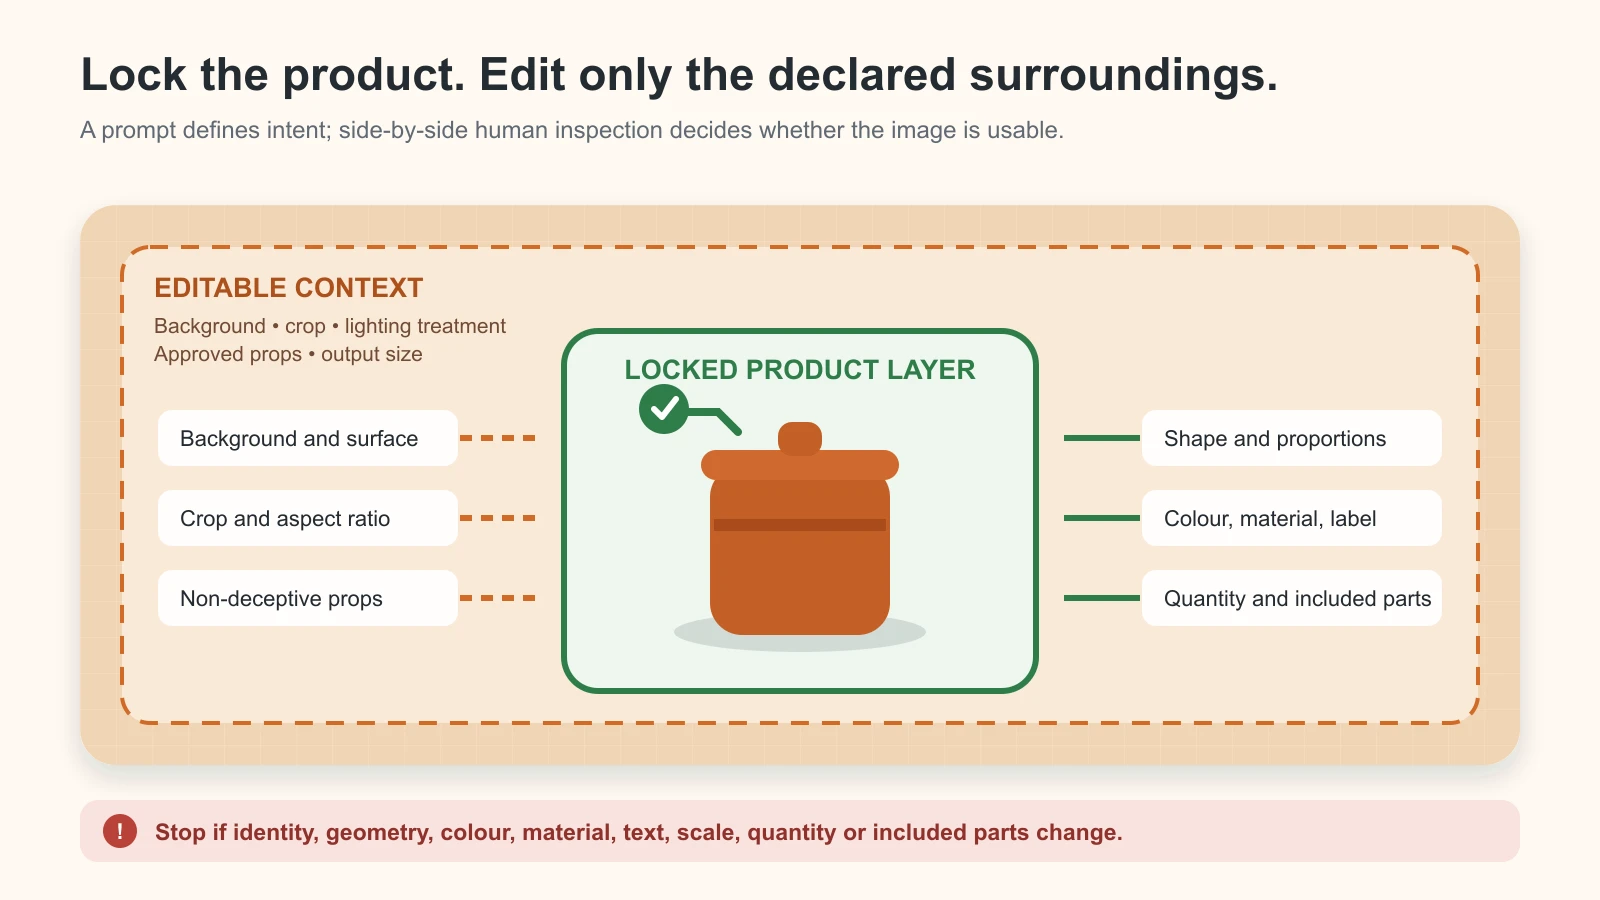
Selecting only the background does not prove that the product will remain untouched. OpenAI’s current image-editing guidance says selections are not always precise and an edit may extend beyond the targeted area. Google’s current Product Studio guidance calls its generative features experimental and warns that unexpected outputs may occur. Those are useful operating cautions, not evidence that every edit will fail.
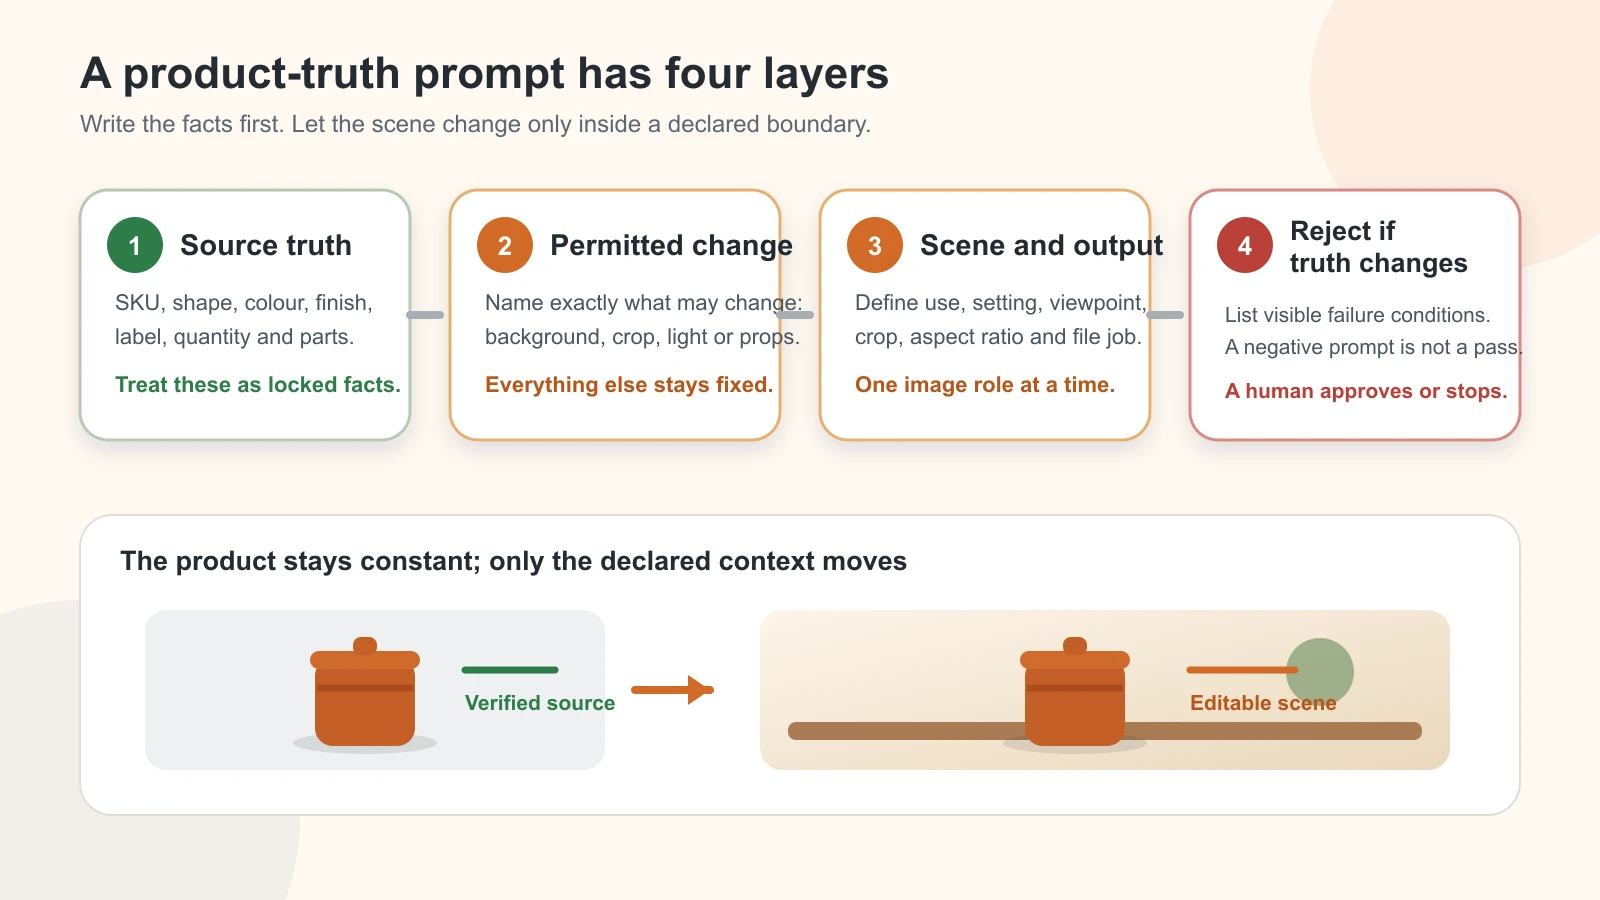
Assume every generated candidate is unapproved until it has passed a comparison with the exact source and the physical or recorded product truth. A prompt can state a constraint; it cannot sign off the output.
Quarantine the image before troubleshooting
When someone notices a defect, stop the candidate from moving into a catalogue, ad folder or seller upload. Do not overwrite the approved source or rename the faulty export as final.
Record these eight facts before editing again:
- exact SKU, child variant and offer quantity;
- intended image role: proof, main, detail, context, ad or internal concept;
- destination and current specification owner;
- source file used, including date or version;
- first visible symptom;
- first file in which the symptom appears;
- product record, physical sample or source view used to verify it; and
- decision: narrow repair, recapture, change method, specialist review or reject.
Call this a defect card. It need not be a new software system. One row in the existing production register is enough.
Describe the symptom without guessing the cause
Write “the right handle disappears at the rear edge” before writing “bad prompt.” Write “the blue child SKU is attached to the green-variant file” before writing “AI colour problem.” The first statement can be checked. The second can send the team to the wrong repair.
Avoid vague diagnoses such as:
- “looks fake”;
- “AI issue”;
- “make premium”;
- “colour is off” without naming the reference and viewing condition; or
- “marketplace rejected” without recording the actual account message and submitted file.
A precise symptom narrows the investigation. It also prevents a team from regenerating the product when the real fault is a crop preset, a mislabelled source or a compressed export.
Find the first wrong file
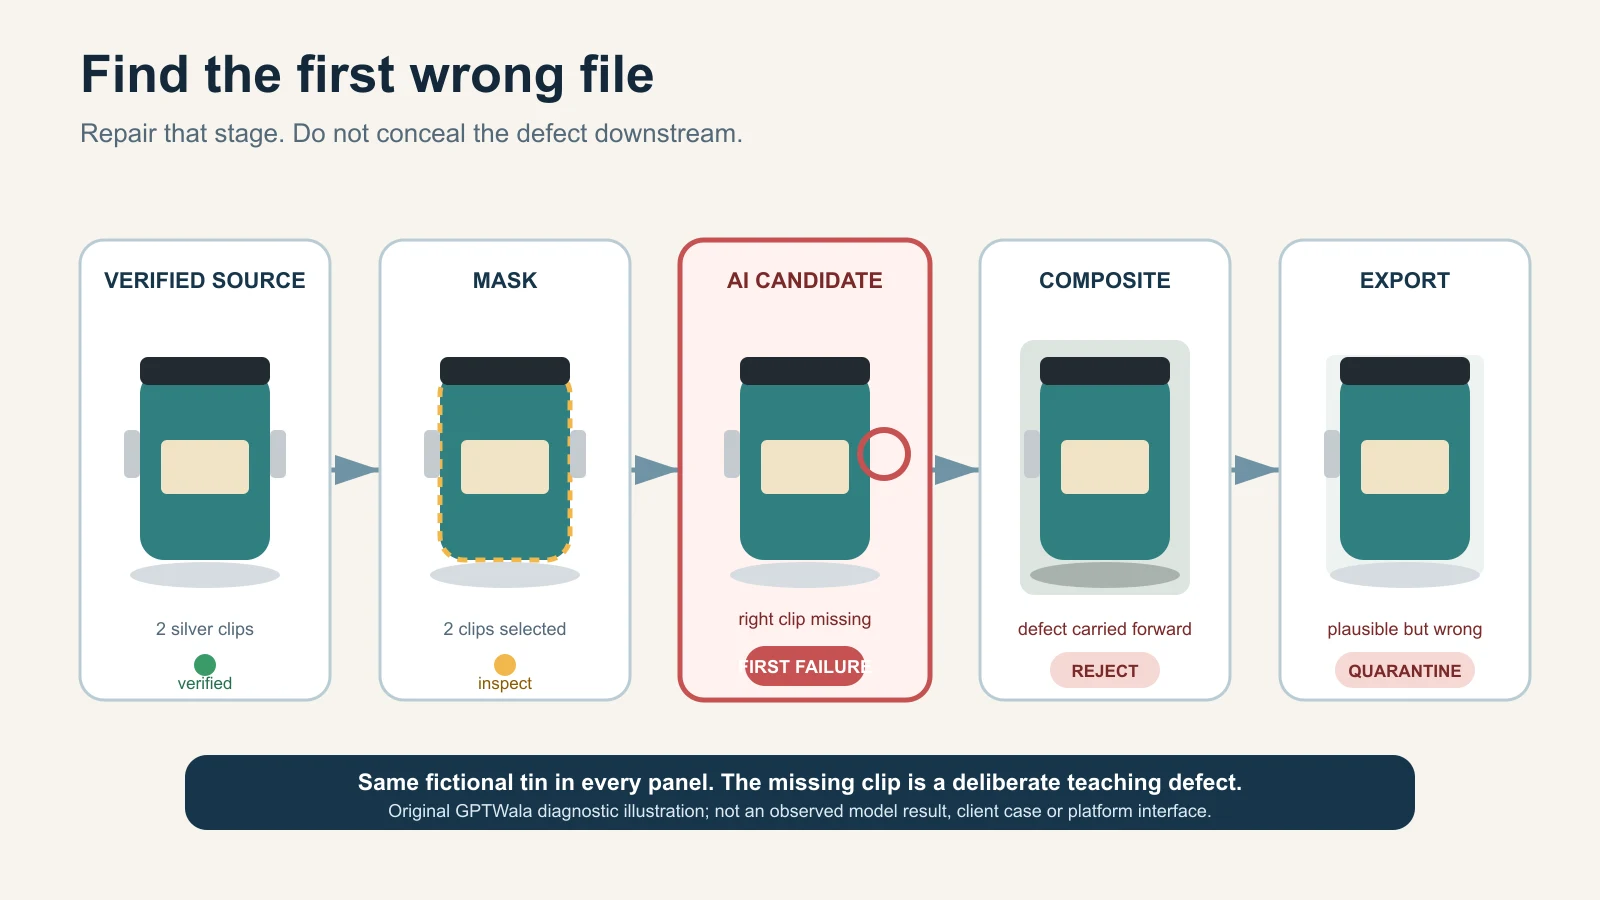
Follow the files in production order:
Verified source → selection or mask → generated candidate → composite → approved master → destination export
Open them side by side at useful magnification. Ask one question at every step: Is the named defect already present here?
| First wrong stage | What it usually means | First safe action |
|---|---|---|
| Verified source | The camera did not capture the field, the wrong SKU was photographed, or the record is incomplete | Stop editing; correct the SKU mapping or recapture |
| Selection or mask | Fine edges, holes, transparent areas or gaps were included/excluded incorrectly | Rebuild a smaller, cleaner non-destructive selection |
| Generated candidate | The editor altered protected pixels, inferred an unseen detail or introduced an object | Reject candidate; constrain the edit or retain the real product layer |
| Composite | Light, perspective, contact, scale or occlusion no longer agrees | Rebuild the composite with measured geometry and a real retained product layer |
| Approved master | Approval was attached to the wrong version or an unverified repair was flattened in | Revoke approval; return to the last verified file |
| Destination export | Crop, resize, colour conversion, metadata handling or overlay changed the approved asset | Re-export from the approved master; do not regenerate |
This “first wrong file” method matters because late-stage repairs can conceal an early truth failure. If the source never shows the back label, sharpening the final image cannot recover it. If the approved master is correct but a square preset cuts off the handle, a new AI image is unnecessary.
Run one diagnostic check, not five speculative edits
Choose the smallest test that can confirm or reject the suspected cause:
- toggle the candidate over the source at 50% opacity;
- place matching landmarks on silhouette, holes, seams or corners;
- compare an exact label crop with the verified artwork or source photo;
- count components and included items;
- view source and candidate under the same colour-managed conditions;
- disable the generated background and inspect the product edge;
- compare the approved master with the delivered export; or
- open the production register and verify the SKU-to-file relationship.
If the check does not isolate the problem, return to the symptom. Do not compensate by adding more prompt adjectives.
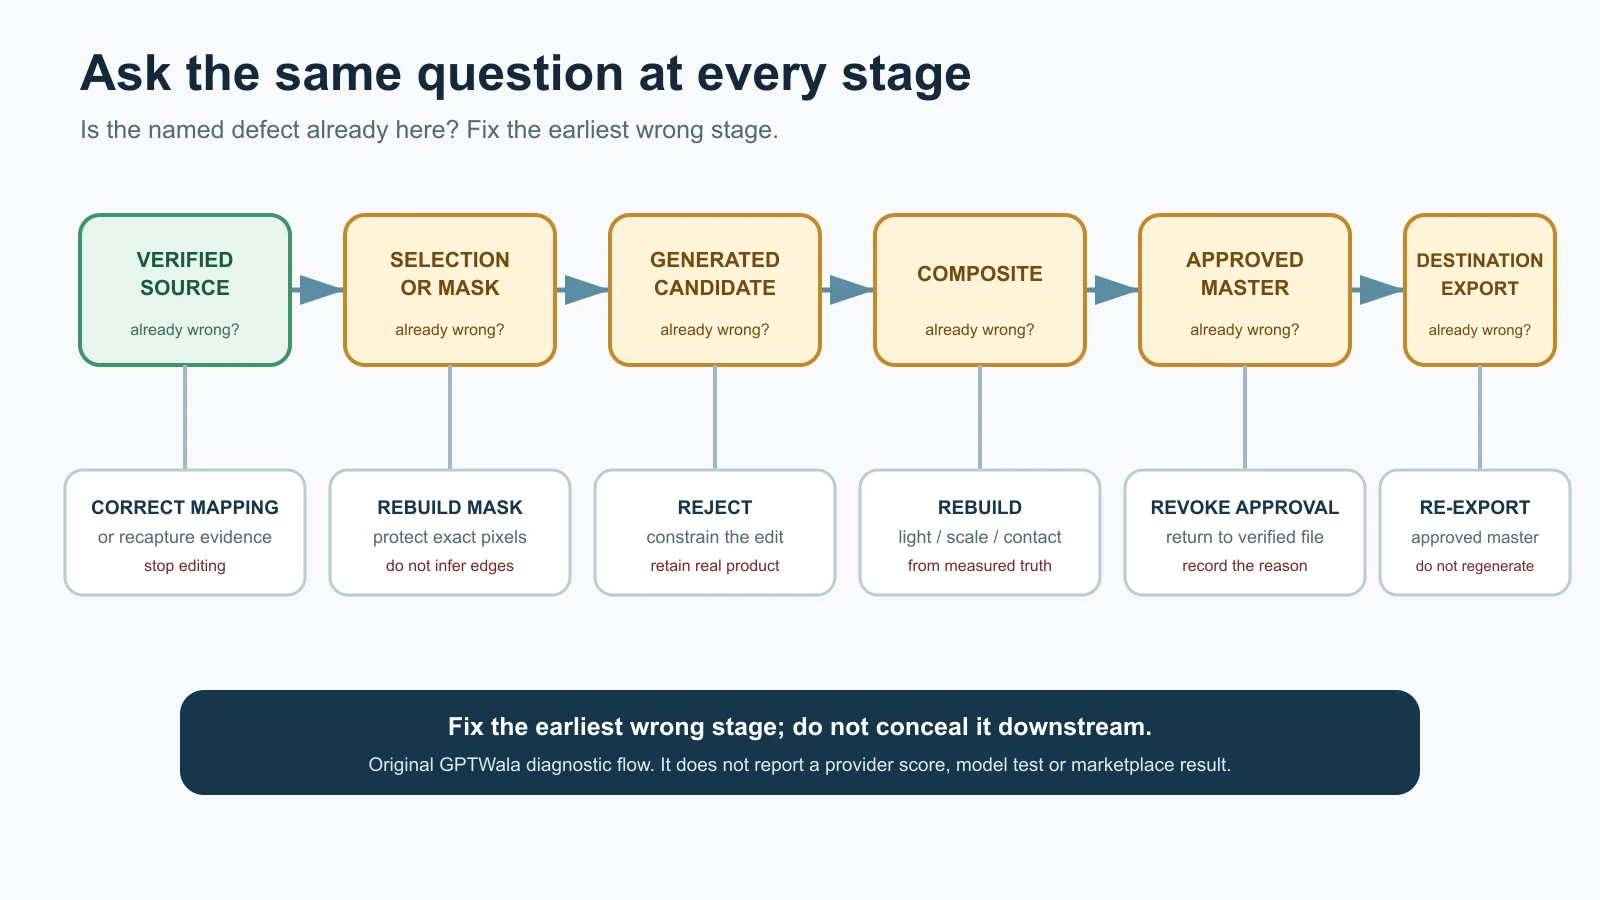
Fix the earliest wrong stage; do not conceal it downstream. Original GPTWala diagnostic flow with native labels; it reports no provider score, model test or marketplace result.
AI product photography mistakes: symptoms, causes, fixes and stop rules
Use this table as triage. “Likely cause” is a hypothesis to test, not a diagnosis made from appearance alone.
| Symptom | Likely cause | Diagnostic check | Safe fix | Stop or recapture when |
|---|---|---|---|---|
| Wrong product or neighbouring variant | Wrong source, filename or SKU mapping | Match physical item, SKU record and source identifier | Correct mapping; restart from the verified source | Exact variant cannot be established |
| Label, logo or printed text is garbled | Generative reconstruction, low-resolution source or aggressive enhancement | Compare characters, line breaks, placement and legal/product fields with verified artwork and real pack | Restore exact approved artwork or untouched real label layer | Source/artwork is missing, outdated or unreadable |
| Pack count or included accessory changes | Model inferred a set or styling prop; offer record was vague | Count every sale unit and component against the offer record | Remove non-included props non-generatively; rebuild from the exact quantity source | It is unclear what the customer receives |
| Product gains or loses a part | Occlusion, incomplete source pack, mask error or generative completion | Compare front, back and detail views; trace the part into the mask | Restore verified pixels; repair mask narrowly | Part is not visible in any source or affects function/safety |
| Silhouette, port, seam or construction drifts | Broad edit changed protected geometry | Overlay source and candidate; pin landmark coordinates | Use retained real product pixels or revert the generation | Geometry cannot be restored without invention |
| Product looks stretched or tilted | Perspective correction, resize or compositing mismatch | Compare corner/axis landmarks and source aspect ratio | Re-transform from the original with proportions locked | Dimensions or fit would be materially misrepresented |
| Colour variant shifts | Mixed light, auto correction, background influence, colour conversion or generative relight | Compare with physical item and neutral reference; inspect the approved master/export path | Correct conservatively from a verified reference; publish multiple truthful views if appearance varies | No trustworthy colour reference exists |
| Matte becomes glossy, metal becomes plastic, weave disappears | Smoothing, relighting, denoising or invented material | Compare highlight shape and microtexture at full resolution | Restore source texture; reduce the edit to the surrounding area | Material/finish cannot be verified after repair |
| Pattern, print or texture repeats incorrectly | Generative fill tiled or reconstructed detail | Align motifs, border sequence, grain and intentional irregularity | Restore the real product layer or exact verified texture region | Pattern is a selling feature and source evidence is incomplete |
| Jewellery stone, prong, clasp or link changes | Fine repeated geometry was generated or erased | Count stones/settings; compare macro and construction views | Reject candidate; use real macro or jewellery specialist workflow | One buying-relevant element differs or a mark is unclear |
| Apparel fit, drape, neckline or border changes | Garment was re-generated on a model; source does not prove worn behaviour | Compare flat, mannequin and measured references; inspect seam/border map | Use retained garment layer or real model/mannequin capture | Fit, coverage, fall or construction is a purchase decision |
| Halo, missing edge or jagged cutout | Mask includes background or removes fine/transparent detail | View on black, white and mid-grey; toggle mask edge | Rebuild mask from source; use manual or specialist cutout | Edge cannot be separated without inventing fibres, chain or transparency |
| Product floats or shadow points the wrong way | Contact point, light direction or surface plane mismatch | Draw baseline and light direction; inspect gap at contact edge | Rebuild a subtle physically consistent shadow outside the product | Product scale/contact cannot be verified in the scene |
| Product appears too large or small in context | Unmeasured scene, generated hand/model or lens/perspective mismatch | Compare recorded dimensions with a known plane or reference object | Rebuild at measured scale; label dimensions accurately | Context determines fit, clearance or safe use and measurement is absent |
| Context implies an unsupported use | Prompt created installation, ingredient, compatibility or performance meaning | Ask what claim a reasonable buyer could infer; compare product records | Choose a neutral context or a verified real use case | Use, compatibility, safety or performance is not documented |
| Crop hides a handle, connector, border or pack edge | Destination template or subject detection cropped the product | Compare approved master and export with safe-area overlay | Re-export with a product-specific crop | Required identifying or functional feature will not fit the format |
| Text overlay becomes part of the product offer | Promotional badge, price or claim overlaps or appears printed on pack | Compare clean master and destination creative; read the full message | Keep clean commerce master; add only reviewed native overlay for an allowed role | Destination forbids overlay or claim is unsupported |
| Upscale looks sharp but creates false microdetail | Generative upscale or sharpening fabricated texture/characters | Compare pixels with the highest-quality real source, not only the low-res version | Use a better source or conservative non-generative resize | Detail is needed to verify label, finish, setting or construction |
| AI/provenance metadata disappears | Export, conversion, CDN or download path stripped metadata | Inspect the actual delivered file with a metadata reader | Re-export through a tested path; retain original and provenance record | Destination requires metadata and preservation cannot be confirmed |
| Correct image is attached to the wrong listing | Manual copy, reused folder, ambiguous filename or variant merge | Reconcile file ID, SKU, product record and destination item ID | Correct the mapping and review affected neighbouring records | Scope of the mapping error is unknown; quarantine the batch |
| Batch style changes from one SKU to the next | Prompts, templates, reviewers or source angles vary | View contact sheet grouped by visual family while keeping SKU truth cards open | Correct presentation controls in a small batch | “Consistency” repair would change a real variant field |
| Final file differs from the approved master | Wrong version, compression, colour conversion or post-approval edit | Hash/version check where available; visually compare exact delivered file | Replace with a fresh derivative from the approved master | Approval trail cannot identify the released source |
Do not turn this table into a blind automation
The table helps a reviewer choose the next check. It cannot see the physical SKU, know the seller’s offer or decide whether a material difference matters. A reviewer with product authority must make the final call.
Diagnose identity, text and quantity failures
Identity, text and quantity failures are automatic commercial risks because they can change what the customer believes they will receive.
Wrong SKU is a mapping problem until proven otherwise
Before blaming the model, inspect the folder and register. Similar variants are easily confused: two Morbi tile finishes, adjacent bottle sizes, right- and left-hand machine components, a necklace sold with or without earrings, or a sari design in two border colours.
Verify:
- physical sample or authorised source ID;
- exact child SKU and revision;
- colour, size, finish and configuration;
- pack quantity and included components;
- source date; and
- destination item ID.
If the source belongs to another variant, no prompt can repair the mapping. Start again with the correct record.
Restore text; do not rewrite it from memory
Labels can contain identity, ingredients, capacity, warnings, directions, certification references, manufacturer information and other important fields. A visually plausible replacement is not acceptable.
Use one of these routes:
- retain the exact real label pixels when they are clean and legible;
- place authorised current artwork at the verified angle and dimensions, then obtain owner approval; or
- recapture the pack or label.
Do not ask a generative model to “make the text readable.” Do not reconstruct blurred characters from memory. Do not borrow artwork from a related size or market. If the current artwork is disputed, the content owner—not the image operator—must resolve it.
Count the offer twice
Count the physical items in the source and count the items in the final candidate. Then compare both with the actual offer record.
A styling bowl beside a spice pack can look included. A generated necklace set can acquire a second bangle. A B2B component image can show four pieces although the quote is per piece. A “pair” can accidentally become one item through cropping.
Where the offer is ambiguous, stop. Fix the commercial record before making the image.
Diagnose shape, colour and material drift
These errors often survive a quick review because the candidate looks believable. Inspect with the physical product nearby whenever possible.
Geometry: use landmarks, not overall resemblance
Choose points that should not move:
- outer corners and silhouette breaks;
- hole, port, handle and fastener centres;
- neckline, seam, hem and border intersections;
- clasp, prong, hinge and joint positions;
- cap, shoulder, base and label boundaries; and
- intentional gaps or negative spaces.
Overlay the candidate on the source and toggle visibility. Small camera changes can prevent perfect pixel alignment, so the purpose is not to manufacture a numeric accuracy score. It is to expose a changed construction, proportion or missing part.
Recent research still treats fine-grained product identity preservation—including branding and text—as a hard image-editing problem. The 2026 ProductConsistency paper is a preprint, not a commercial tool guarantee, but its problem framing supports the conservative rule: plausible resemblance is not proof of exact product preservation.
Colour: trace the whole path
Colour can change at capture, edit, compositing, export or display. Diagnose in order:
- Was the source captured under mixed or strongly coloured light?
- Is there a neutral reference or the physical product for comparison?
- Did the background create a visual colour contrast?
- Did the AI relight or “enhance” the product?
- Did the export change colour space or profile?
- Does the delivered file differ from the approved master?
Do not promise that every viewer will see an exact screen match. Preserve the real variant, avoid dramatic colour grading and give multiple truthful views when a finish changes with angle or light.
Material: keep the cues that make it identifiable
Material truth often lives in small cues: weave, grain, pores, brushed lines, edge highlights, translucency, uneven handmade texture or surface reflection. Removing all “imperfections” can remove the product itself.
Reject an edit that:
- turns brushed metal into mirror chrome;
- smooths handloom weave into synthetic-looking fabric;
- makes glazed tile appear matte or vice versa;
- converts translucent packaging into opaque plastic;
- invents uniform sparkle across jewellery; or
- fills wood, leather or stone with a repeated synthetic texture.
If those cues were not captured, recapture under better light. An upscale cannot reveal real detail that the camera never recorded.
Diagnose edges, shadows and scale
These are presentation problems until they begin changing product meaning.
Check edges on three backgrounds
Place the cutout against black, white and mid-grey. This reveals white fringes, dark contamination, missing translucent detail and over-feathered edges. Inspect at normal page size and at magnification.
Repair the selection, not the product. Fine apparel fibres, glass edges, jewellery chains, handles, holes and open metalwork may need a manual path, channel-based mask, specialist retouch or a better source. If the edge cannot be separated without reconstructing the product, stop and recapture.
For the full process of creating a new setting while protecting product pixels, use the AI product-background generation guide. This troubleshooting page only diagnoses the fault.
Ground the product before beautifying the scene
A grounded product needs agreement between contact, surface plane, perspective, shadow direction and light. Use a simple diagnostic:
- draw the contact baseline;
- mark the dominant light direction;
- identify the surface plane;
- check whether the shadow begins where the product touches it; and
- ask whether the shadow softness fits the apparent light size and distance.
If the scene is too complex to solve without changing the product, simplify it. A neutral background with a quiet, physically plausible shadow is safer than an impressive room that makes the product float.
Measure scale when context influences purchase
A generated hand, shelf, room or model can change apparent size. Record product dimensions first. Then check the object’s placement on a known plane or use a real measured reference outside the clean image.
Use real capture when context answers a fit, clearance, installation or safety question: garment fit, jewellery fall, furniture proportions, machine clearances, connector placement or an item worn near the face/body. A generated context can illustrate an idea; it should not become unverified measurement evidence.
Diagnose file, channel and hand-off failures
The product can survive the AI edit and still fail after approval.
Reopen the delivered file
Inspect the exact file that a website, feed, dealer or marketplace will receive—not only the editor canvas. Check:
- product and offer still match;
- crop retains the whole required view;
- small text and detail remain legible where needed;
- colour and transparency behave as expected;
- filename/version maps to the correct SKU;
- overlays are allowed and supported;
- file format and size match the current destination; and
- required provenance metadata remains in the delivered asset.
Google Merchant Center’s current main-image guidance asks for the actual, correct product and variant, including colour, pattern and material, and restricts placeholders and promotional overlays. Its current AI-content guidance says applicable generative-AI product images submitted in specified image attributes should retain the named IPTC digital-source metadata. Those are Google-specific requirements; use the product-image rules by channel for a broader destination check.
Do not assume that an editor export, WebP conversion, WordPress optimisation plugin, CDN or platform download has preserved metadata. Test the real delivery path. C2PA’s own explainer also cautions that provenance can be incomplete or removed and that provenance alone does not establish whether content is true. Keep product review and file provenance as separate checks.
Treat “rejected by platform” as an observed event, not a diagnosis
Record:
- the exact submitted file;
- seller account, category and destination;
- submission time;
- actual status or message;
- any human-support response; and
- the next controlled change.
Do not invent a reason from a generic article. Do not claim that a file is “marketplace-approved” because it looks compliant. Rules, enforcement and account states can differ and change.
Misleading can happen by implication
The Advertising Standards Council of India’s current code says advertisements should be truthful and honest and that visual presentation should not mislead through implication, omission, ambiguity or exaggeration. ASCI is a self-regulatory body, and this article is not legal advice. The practical lesson is simple: a false impression can come from scale, context, included props or a perfected material—not only from written copy.
Choose the safe repair level
Use the lowest repair level that can restore a verified result.
| Level | Action | Appropriate when | Never use it to |
|---|---|---|---|
| 0 — Mapping correction | Attach the right approved file to the right SKU/destination | Image is correct; relationship is wrong | Pretend a neighbouring variant is acceptable |
| 1 — Re-export | Create a fresh crop/format/size from the approved master | Failure appears only after export | Rebuild missing product detail |
| 2 — Narrow presentation repair | Correct mask, dust, outside background or physically consistent shadow | Product pixels and truth fields remain verified | Alter label, construction, material or quantity |
| 3 — Restore verified product evidence | Return the real product layer or authorised artwork | Generation damaged a known field but exact evidence exists | Invent unseen sides or characters |
| 4 — Recapture | Photograph the exact item, angle, label, texture, scale or part again | Source evidence is missing or technically unusable | Avoid resolving an uncertain SKU/offer record |
| 5 — Change method or specialist | Use real studio, hybrid composite, retoucher or category specialist | Repeated defects affect high-risk detail | Turn an unverified candidate into proof |
| 6 — Stop/reject | Remove asset from production | Truth, rights, safety or offer cannot be verified | Keep a plausible image because of deadline pressure |
One controlled repair is better than a chain of untracked regenerations. If the same locked field fails again, escalate the method. Repetition is evidence that the current lane is a poor fit for that product, not an invitation to lower the approval standard.
When to stop AI and recapture the product
Recapture is mandatory when the source cannot prove a buying-relevant fact and no exact verified asset can restore it.
Stop and use real capture when:
- exact SKU or child variant is uncertain;
- label, legal text, warning, mark or identifier is unreadable;
- a hidden side contains ports, seams, fasteners, ingredients, settings or accessories that matter;
- colour/finish is important and no trustworthy reference exists;
- count, quantity or included components are disputed;
- scale, fit, drape, clearance or installation is a buying decision;
- jewellery settings, hallmark area or fine construction cannot be checked;
- an AI enhancement has invented microdetail;
- transparent, reflective or fine-edged material cannot be separated reliably;
- rights to the source, artwork, model or reference are unclear;
- a safety, compatibility, certification or performance impression cannot be supported; or
- two controlled attempts repeat the same truth failure.
The “two attempts” point is a practical escalation rule, not a universal accuracy statistic. A critical identity failure can require stopping after the first candidate. A harmless crop adjustment may take more than two non-generative exports.
Automatic-reject fields
Reject immediately if the final asset changes or leaves unresolved:
- product identity or variant;
- offer quantity or included component;
- label, logo, mark or buying-relevant text;
- silhouette, construction, fit or functional geometry;
- material, finish, pattern or meaningful colour;
- product scale where context affects the decision;
- compatibility, safety, use or performance implication;
- rights or consent; or
- final SKU-to-file mapping.
The product-accuracy audit for AI images remains the owner of the full governance and approval record. This page tells the reviewer what to do after a symptom appears.
Troubleshooting examples for Indian product businesses
These are fictional operating examples, not client results, city-wide claims or tested tool outcomes.
Surat apparel seller: the sari border changes on a model
Symptom: motifs near the pallu repeat differently and the border becomes narrower.
First wrong file: the generated model candidate; the flat source and mask are correct.
Diagnostic: compare the border sequence, seam intersections and pallu map with the real sari. Check whether the garment was re-generated rather than retained.
Decision: reject. Use the real garment layer, a controlled mannequin composite or a real model shoot. Fit and drape need the specialist AI model-photo workflow for apparel; prompt repetition is not a safe repair.
Jaipur jewellery retailer: an earring gains a stone
Symptom: the product still looks symmetrical, but one accent stone and two prongs differ.
First wrong file: the generated candidate.
Diagnostic: count each stone and setting against a real macro of both actual earrings. Check backs and offer quantity separately.
Decision: reject the candidate. Restore real pixels or recapture. Use the AI jewellery photography truth checklist for stone, setting, clasp, reflection and hallmark-specific review.
Rajkot component manufacturer: the threaded port is softened
Symptom: an internal thread looks smooth and the hole diameter appears larger.
First wrong file: an aggressive cleanup/upscale.
Diagnostic: compare the original macro and engineering/product record; inspect whether the feature is necessary for identification or fit.
Decision: stop AI enhancement. Recapture the port or supply an approved technical/detail photograph. Do not use a generated thread as compatibility evidence.
Morbi tile wholesaler: two finishes become one
Symptom: matte and satin variants look nearly identical after background and colour standardisation.
First wrong file: the batch composite; the source files preserve the difference.
Diagnostic: compare highlight width, surface texture and child-SKU mapping under the same viewing conditions.
Decision: restore each real surface and create separate visual-family settings if required. Consistency should standardise presentation, not erase the finish a buyer orders.
Packaged-goods retailer: the front label is “cleaned up”
Symptom: the brand looks correct at a glance, but one quantity line and two characters differ.
First wrong file: the generated enhancement.
Diagnostic: compare with current authorised artwork and the exact physical pack; verify the pack size and market version.
Decision: reject. Use real label pixels, exact authorised artwork with owner sign-off, or a new capture. Never recreate packaging text from memory.
Multi-SKU wholesaler: the correct image reaches the wrong row
Symptom: the image itself passes review, but a six-hole part appears against the four-hole SKU.
First wrong stage: catalogue mapping after approval.
Diagnostic: reconcile asset ID, child SKU, product record and destination item ID; inspect adjacent rows for the same copy error.
Decision: quarantine the affected batch, repair the mapping and re-review the release manifest. Use the AI catalogue photography system for manufacturers and wholesalers to prevent recurrence.
Prevent repeat failures with a small defect log
A defect log should accelerate production, not become a new project. Add one row only when a candidate fails or requires a consequential repair.
| Field | Example value |
|---|---|
| Asset/SKU | Fictional SKU MUG-TEAL-02 |
| Symptom | Right handle gap filled |
| First wrong file | Generated candidate v03 |
| Suspected layer | Selection/reference |
| Diagnostic check | Source/candidate overlay; black-background edge check |
| Safe action | Rebuild mask; retain real handle pixels |
| Result | Candidate rejected; v04 sent to review |
| Reviewer/date | Named product owner / date |
Use short reason codes to make patterns visible:
| Code | Meaning | Example |
|---|---|---|
| ID01 | Identity or variant | Wrong child SKU |
| OF01 | Offer, quantity or text | Extra accessory; pack count changed |
| GE01 | Geometry or construction | Missing handle; changed seam |
| MA01 | Material, colour or pattern | Matte became glossy |
| CT01 | Context, scale or claim | Product floats; unsupported installed use |
| PL01 | Platform/destination | Disallowed overlay or current rule conflict |
| EX01 | Export/delivery | Crop, compression, colour or metadata loss |
| RT01 | Rights/consent | Source or reference permission unresolved |
Review the log after a meaningful batch, not after every pixel change. If the same code repeats for one product family, alter the source pack, template, method or review gate. Do not interpret a small internal log as a model-wide accuracy benchmark.
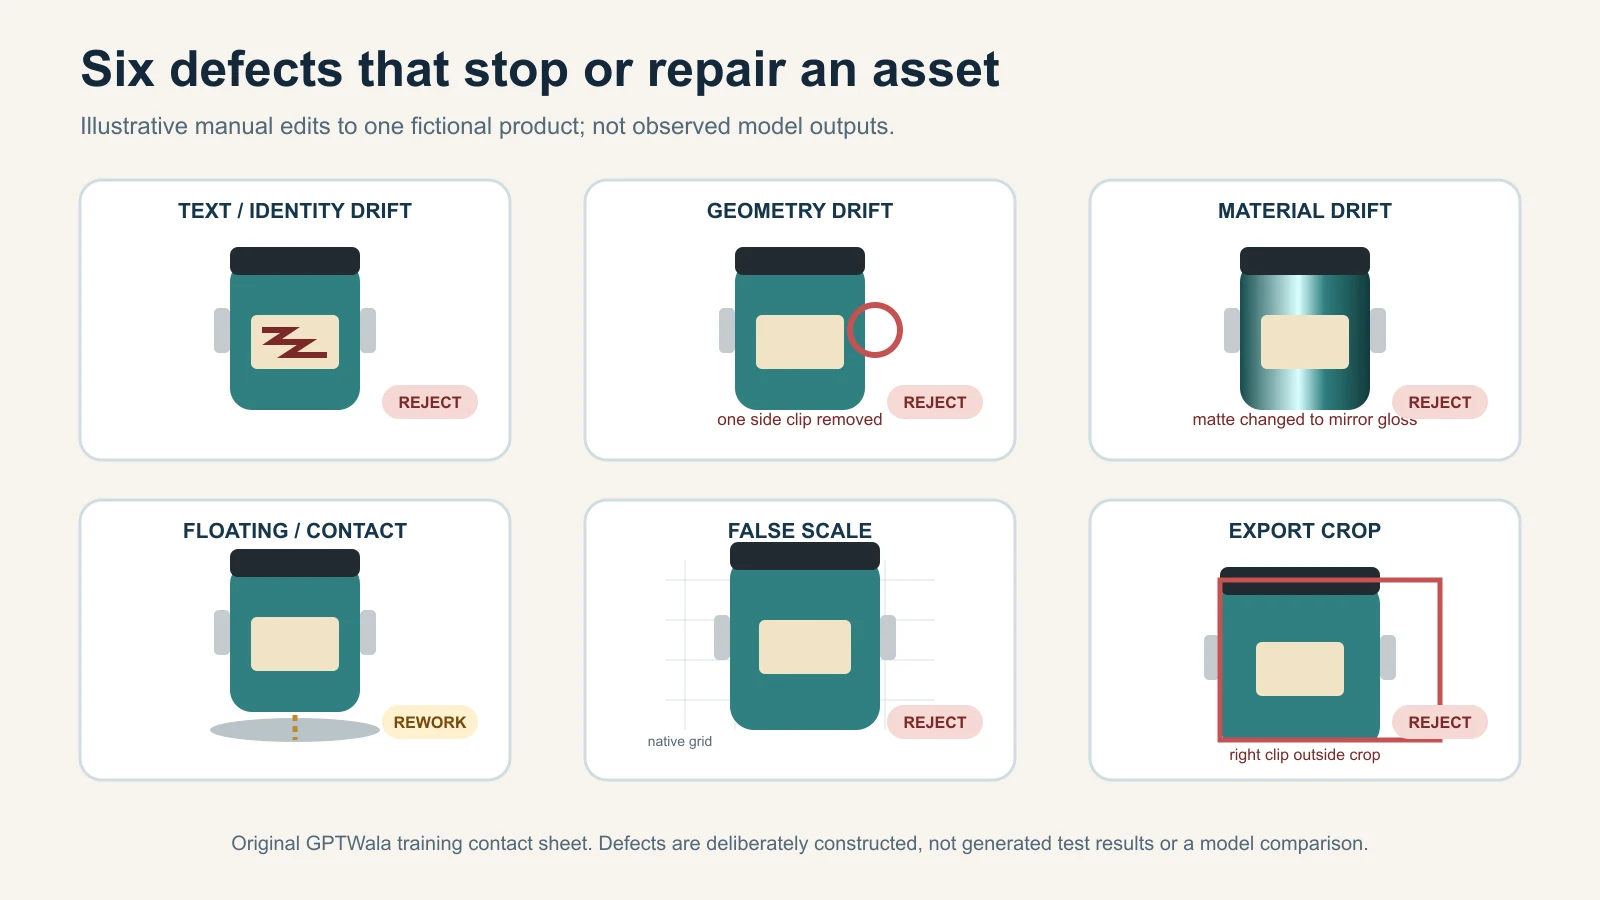
Illustrative defects built manually from one locked fictional product for training; not observed results or a model comparison.
Final AI product image rejection checklist
Use this on the exact delivered file. One “no” in a critical field keeps the asset out of production.
Identity and offer
- [ ] Exact child SKU and revision are confirmed.
- [ ] Colour, size, finish and configuration match.
- [ ] Pack quantity and every included component match the offer.
- [ ] No prop or context object appears included by mistake.
- [ ] Label, logo, mark and product text match verified evidence.
Product construction and appearance
- [ ] Silhouette, dimensions and proportions are not stretched.
- [ ] Ports, holes, handles, seams, fasteners, settings, joints and accessories are complete.
- [ ] Pattern, border, texture, grain and intentional irregularity remain real.
- [ ] Material, finish, colour and reflection cues remain truthful.
- [ ] No generated detail is being used as proof.
Presentation and context
- [ ] Edge is clean on light, dark and mid-tone backgrounds.
- [ ] Product contact, perspective, light and shadow agree.
- [ ] Context does not imply unsupported size, fit, installation, safety, compatibility or performance.
- [ ] Crop preserves all features needed for this image role.
- [ ] Any native text overlay is accurate, approved and allowed for the destination.
File and release
- [ ] Final delivered file matches the approved master.
- [ ] Filename, asset ID and destination item map to the correct SKU.
- [ ] Current account/category/platform requirements were checked at publication time.
- [ ] Required AI/provenance metadata is present in the actual delivered file where applicable.
- [ ] Rights, model consent, artwork authority and reviewer sign-off are recorded.
Record approved, rework, real capture required or rejected. “Looks fine” is not a release status.
Turn fewer rejected images into a stronger online system
Troubleshooting is useful when it gets verified product content moving again. It should not become endless image polishing.
The GPTWala workshop connects this AI Content Creation work to the DAA path: Digital Presence → AI Content Creation → ₹100/day WhatsApp ads. The workshop is educational; it does not promise enquiries, sales, earnings or return on ad spend. Advertising claims, targeting, landing pages and follow-up still need their own decisions and controls.
See the GPTWala workshop and decide whether the DAA framework fits your product business.
Frequently asked questions
Why does AI keep changing product labels and logos?
Generative editors may reconstruct small or complex text instead of preserving exact pixels, especially when the source is low resolution or the edit touches the product. Compare the candidate with current authorised artwork and the physical pack. Restore the real label layer or recapture it; never rebuild buying-relevant text from memory.
Why does my product change colour or shape after a background edit?
The selection may include product pixels, the editor may relight or re-generate the object, or the final export may change colour or proportions. Find the first wrong file, then test the mask, source overlay and approved-master/export path. If no verified colour or geometry reference exists, recapture.
Should I fix an AI product image or generate it again?
Use a narrow fix when the source is verified and the defect is limited to presentation or export. Regeneration is not automatically safer. If identity, text, quantity, construction or material changed, restore real evidence, change the method or recapture. Reject repeated truth failures.
What should I do when AI removes a handle, clasp or small part?
Check whether the part is present in the source and mask. If verified real pixels exist, rebuild the selection and restore them. If the part is hidden, blurred or absent from every source, photograph it. Do not ask AI to guess functional construction.
How do I fix a floating AI product photo?
Check the contact baseline, surface plane, perspective, light direction and shadow origin. Rebuild only the scene and shadow around a retained real product layer. If product size or placement cannot be measured, simplify the background or use a real contextual capture.
Can a better prompt guarantee product accuracy?
No. A constraint prompt can reduce ambiguity, but it cannot verify the result or make an unseen detail true. Use exact sources, narrow edits and a human comparison. The product owner—not the prompt—approves identity and offer fields.
Does AI metadata prove an image is accurate?
No. Provenance metadata can help describe an asset’s history, but it may be incomplete or removed and does not prove the depicted product is true. Check both the delivered file’s required metadata and the product itself against verified evidence.
When is one phone photo not enough?
One view is not enough when the missing side contains a label, pattern, component, mark, clasp, seam, port, texture or dimension needed for purchase or review. Capture additional real views. The single-phone-photo tutorial is for controlled presentation candidates, not invention of unseen product truth.
When should I use a photographer or specialist instead of AI?
Use a photographer, retoucher or category specialist when accurate colour, fine construction, reflective/transparent material, apparel fit, jewellery detail, regulated information, installation or high-value proof cannot be captured and verified in the AI lane. The AI versus studio versus hybrid guide helps select the method.
Sources and review method
Reviewed 12 August 2026. Official sources were used for named editor limitations, Google product-image and AI-metadata requirements, Indian advertising context, structured-data implementation and provenance cautions. One current research preprint is used only to support the continuing difficulty of exact product-identity preservation, not as a tested tool result. Operational tables, reason codes, repair levels and Indian examples are original GPTWala editorial guidance. Recheck platform- and account-sensitive claims within 24 hours of publication.
- OpenAI Help Center: Creating images in ChatGPT
- Google Merchant Center: Product Studio
- Google Merchant Center: Main image
- Google Merchant Center: AI-generated content
- Advertising Standards Council of India: The ASCI Code
- C2PA specification 2.2 explainer
- ProductConsistency preprint: product identity preservation in instruction-based image editing
- Google Search Central: General structured-data guidelines
- Google Search Central: Changes to FAQ and HowTo rich results
- Department of Consumer Affairs: Consumer Protection resources